Welcome to the Matless Machine Experience!
Your ultimate tool for precise screen protector cuts for mobile devices, laptops, and more.
Unboxing Video
Watch how easy it is to get started with your new matless machine.
Box Contents
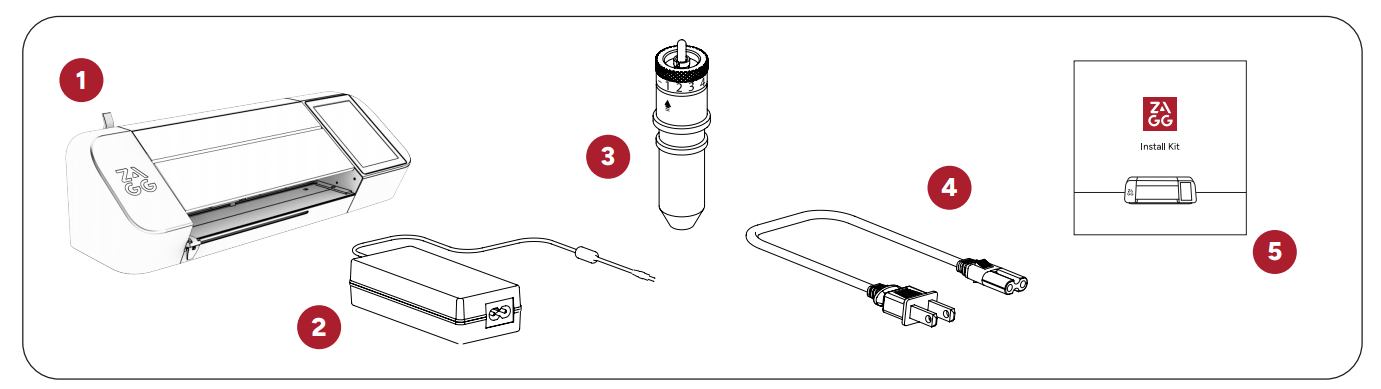
- SmartShield Machine
- Universal Power Supply
- Blade Capsule
- Power Cord (Region Specific)
-
Install Kit
- 1x Wearable Squeegee
- 2x Small Squeegees
- 1x Medium Squeegee
- 1x Large Squeegee
- 1x Installation Mat
- 2x Cutting Blades
- 1x Microfiber Cloth
- 1x Cleaning Solution Spray
- 1x Scraper Squeegee
- 1x Metal Tweezers
This device complies with Part 15 of the FCC Rules. Operation is subject to the following two
conditions:
(1) This device may not cause harmful interference, and
(2) This device must accept any interference received, including interference that may cause
undesired operation.
Connecting
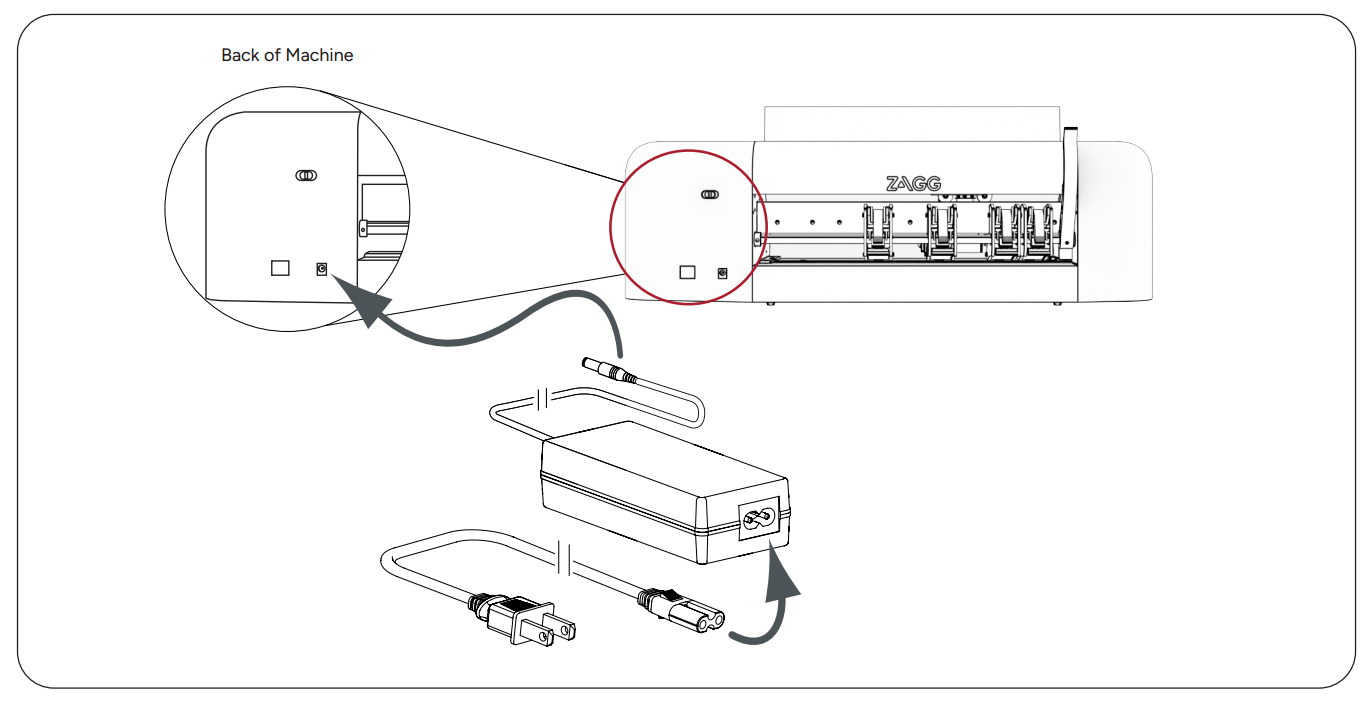
1. Plug Power Cord into Universal Power Supply.
2. Plug Universal Power Supply into the side of the ZAGG SmartShield Machine.
Setting The Blade Depth
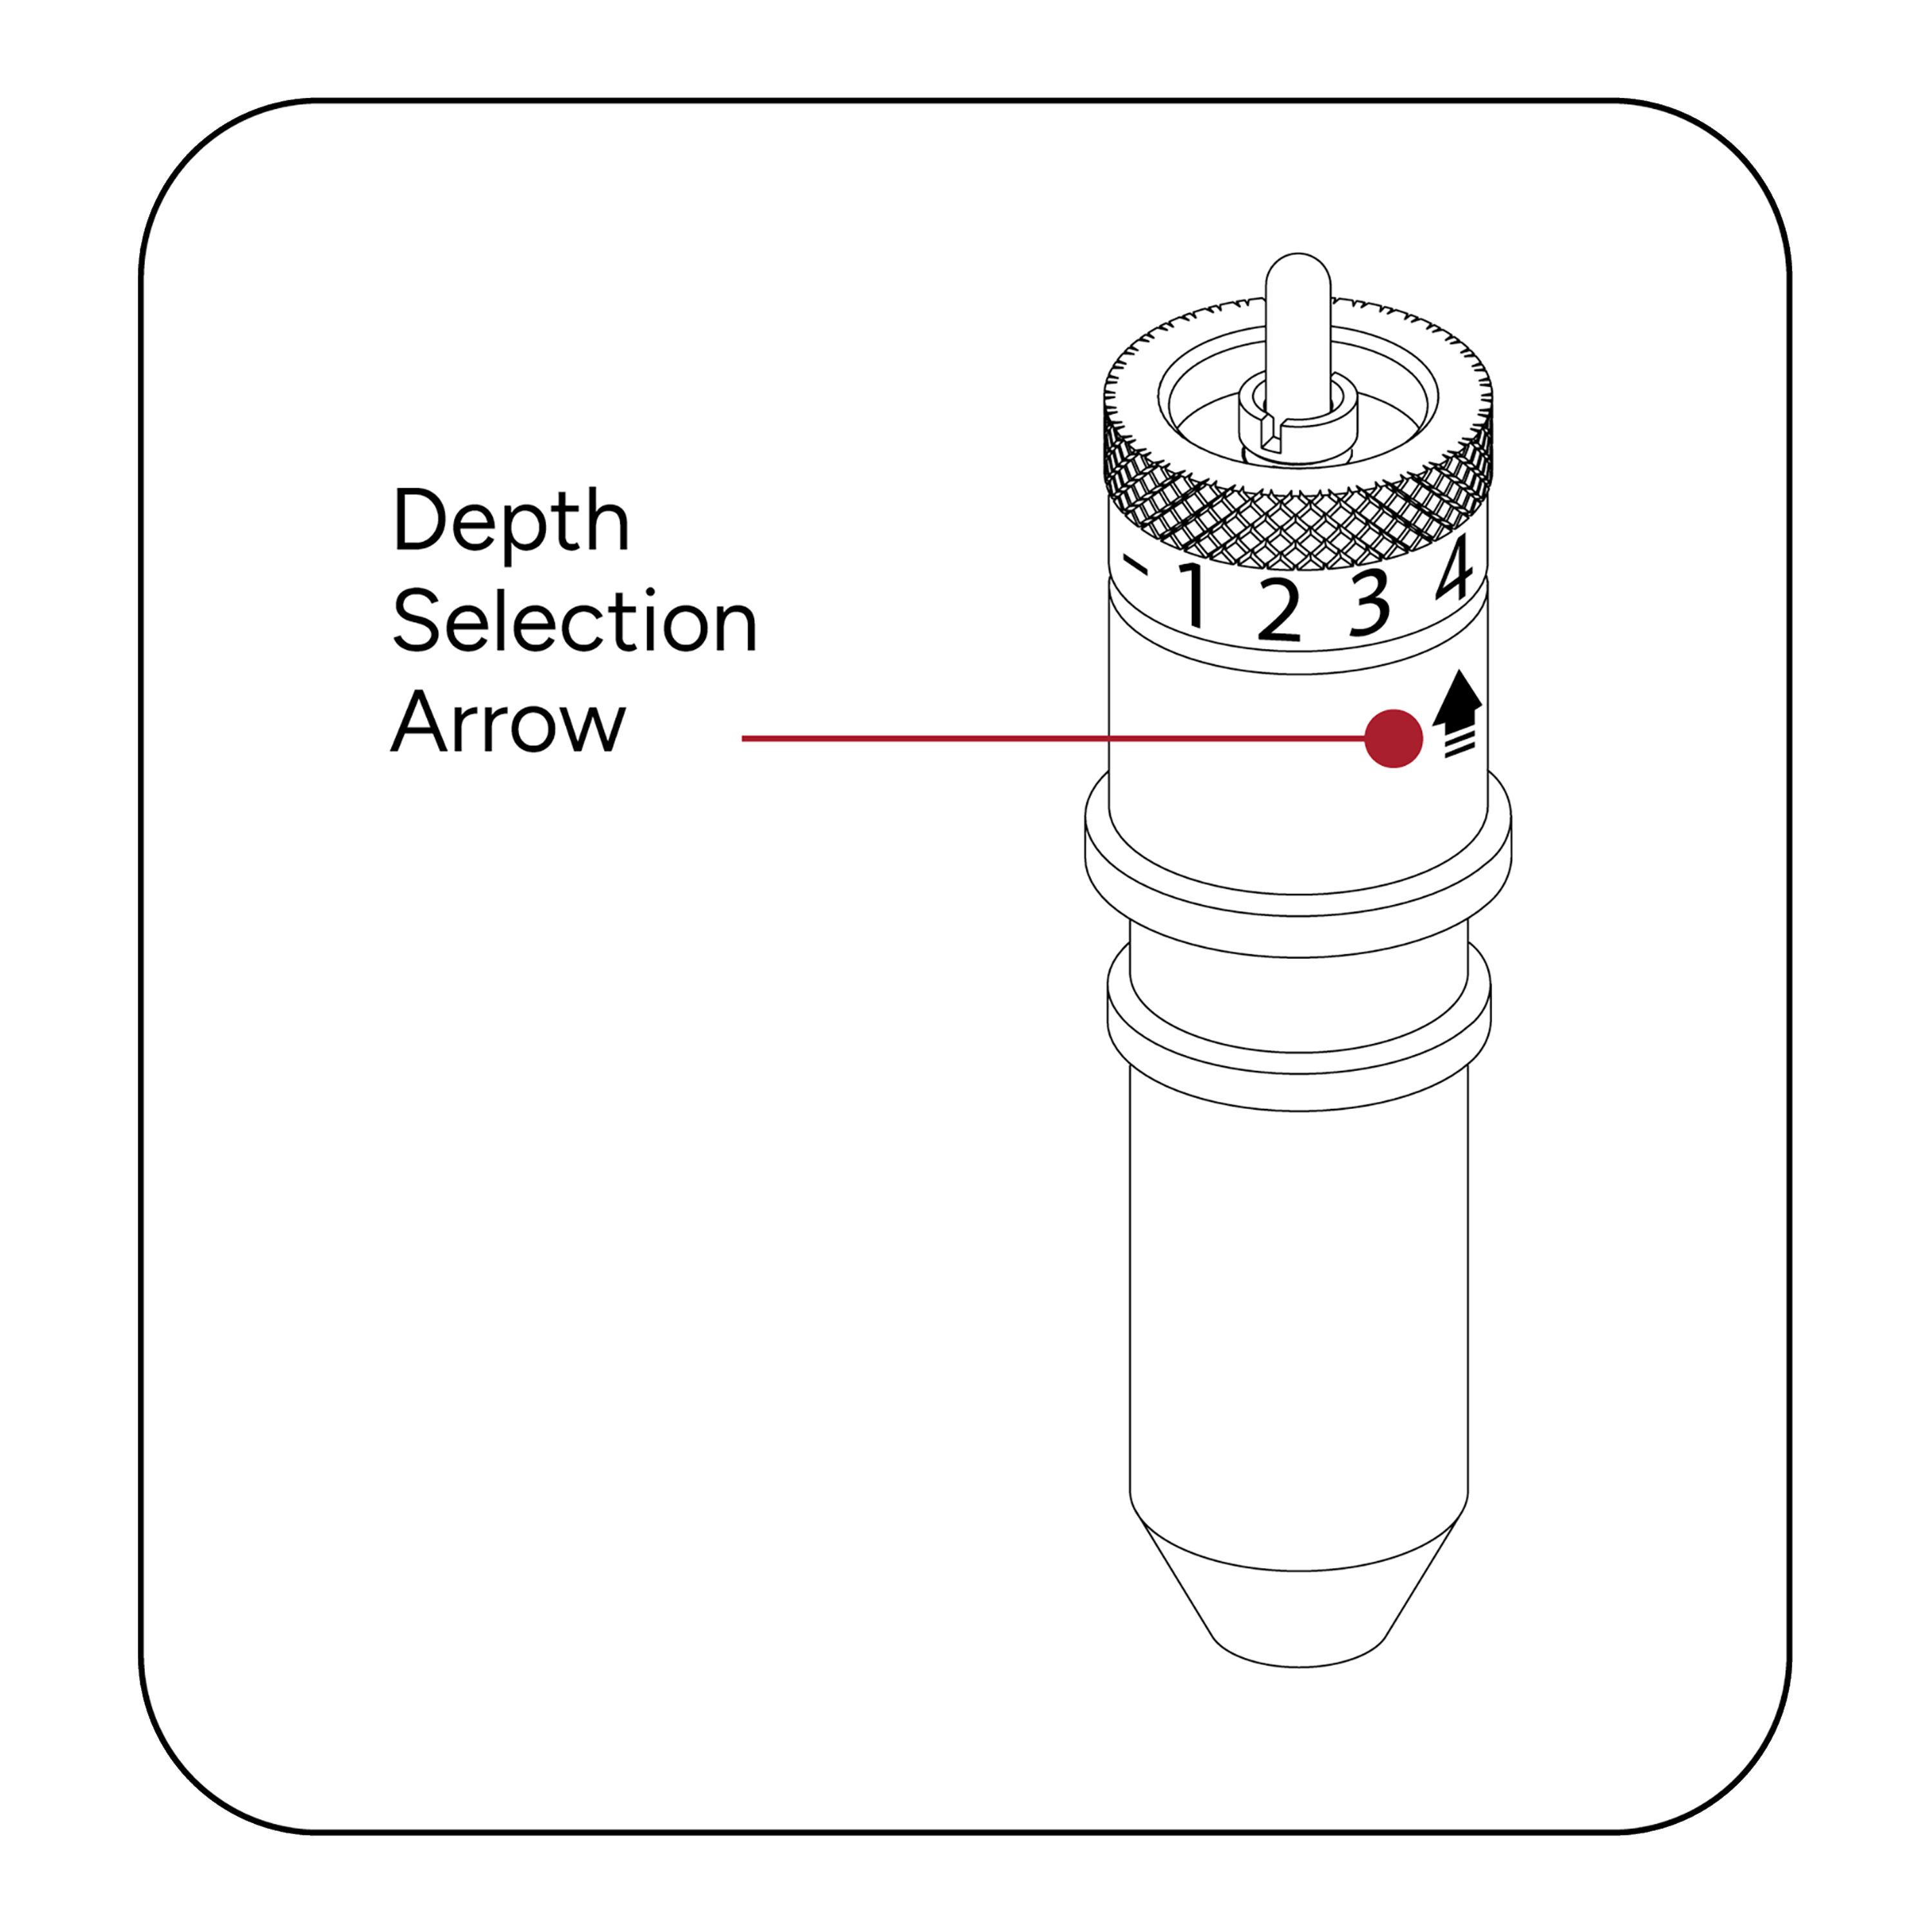
The recommended starting position is level 4. For optimal results, try a test cut and make necessary adjustments to the blade level before performing the final cut.

Inserting the Blade into the Blade Holder
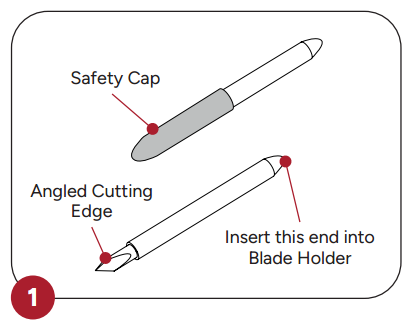
Carefully remove Safety Cap from Blade, exposing Angled Cutting Edge.
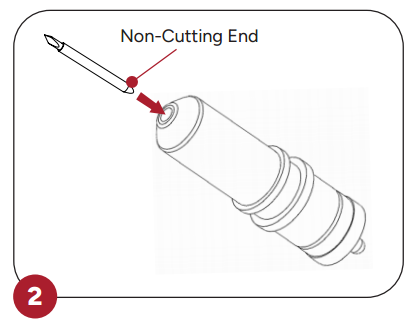
Carefully insert Non-Cutting End of Blade into hole at bottom of Blade Holder. Blade is held in place magnetically.
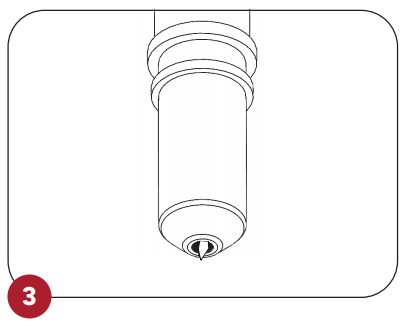
Note that Blade is exposed, but barely visible, when inserted properly.
 CUTTING HAZARD: Blade is sharp, handle with care.
Installing Cutting Blade Holder
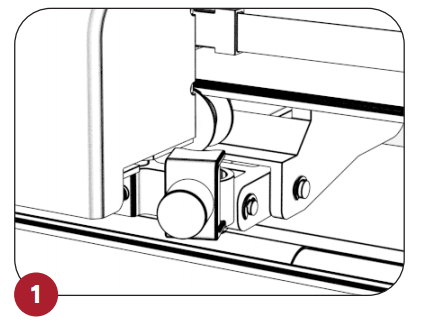
Loosen Clamp by turning Clamp Screw counterclockwise, approx. 1/2 of a turn.
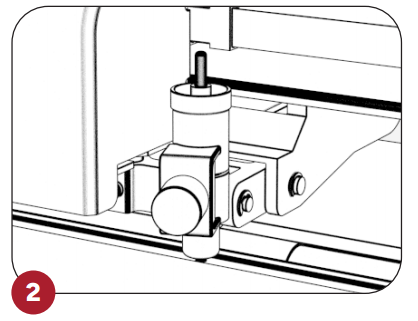
Place Blade Holder into Clamp, making sure that Depth Selection Arrow is facing out.
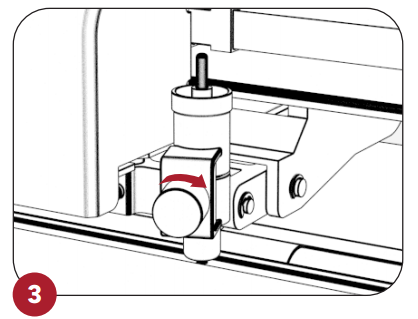
Tighten Blade Holder by turning the Clamp Screw clockwise, until Blade Holder is secure.
 WARNING: MOVING PARTS Keep fingers, hair and clothing
away
WARNING: MOVING PARTS Keep fingers, hair and clothing
away
 CAUTION: Always unplug ZAGG SmartShield Machine before removing or installing Blade Holder.
CAUTION: CUTTING HAZARD Keep fingers away from exposed
blade.
CAUTION: Always unplug ZAGG SmartShield Machine before removing or installing Blade Holder.
CAUTION: CUTTING HAZARD Keep fingers away from exposed
blade.
Making Your First Cut
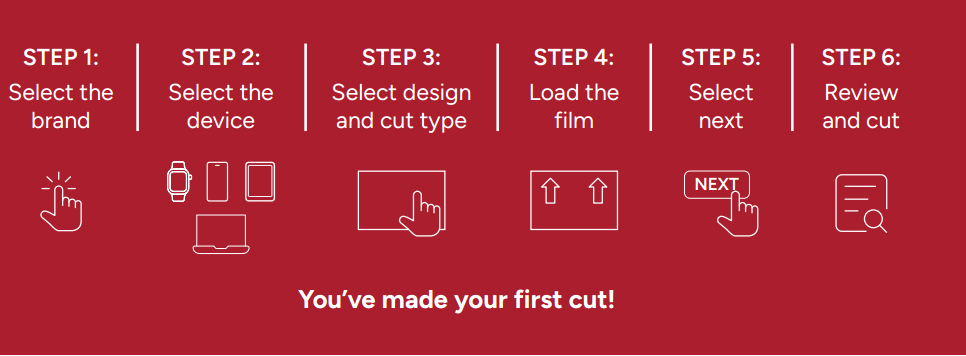
See your machine in action with this comprehensive guide to your first cut:
Replacement Cuts
When a replacement cut is needed, make a new cut and select the relevant cut type for reporting purposes.
Warranty – Customer has left the store and returns due to an issue with their screen protector.
Miscut – An issue occurs while cutting the film.
Install Error – An issue occurs while installing the film on the device.
Frequently Asked Questions
Who to contact
Who do I contact if I have an issue with the Store ID and/or password?
To resolve your issue, you will need to contact our support center. Contact details can be located at the contact section of this website.
Warranty
What is the difference between a miscut, warranty, and installation error?
Please see the below comparison table:
| Miscut | Warranty | Install Error |
|---|---|---|
| The cut was abnormal, not to specifications | Bubbles did not disappear after 48 hours | Poor Installation |
| A portion of the cut was not on the material | Screen protector lifting at the edges | Misalignement |
| The film slipped while cutting | Matte coating scraping off | Dust under the screen protector |
| The machine did not cut all the way through the material | The center line has not disappeared after 48 hours |
How do I record a miscut, warranty, or install error?
Search for and select the device to be cut.
Select “cut type” and choose the appropriate option.
Select the design and proceed with the cut as normal.
Cutting
What do I do if a device is not available in the app?
You can request a new device to be added to the app by following the step-by- step instructions within the “Request Device” section of this website. To avail of this, you also need to use a design board. Printable versions are available in the “Request Device” section of this site.
Where do I find the barcode/QR code to scan for cuts?
The barcode can be located on the bottom left corner of each blank.
The fingerprint sensor on my smartphone is no longer working since ISOD film was installed, what should I do?
ISOD film has been tested and is suitable for use with leading fingerprint scanner technology. We recommend that users re-register their fingerprints on the device after the shield has been installed. This will re-calibrate the fingerprint sensor for the user again. Please note that this may occur days after the shield has been installed.
I have received my new ISOD Matless machine, what do I do next?
1. Please review the user guide for the Matless machine located in the User Guide section of this website.
2. Remove the machine from its packaging and place it on a flat, stable surface, close to a power outlet. For the machine to cut correctly, it needs 20 to 25cm of available space behind it. This is required so the material can pass cleanly through the machine. Follow the out of the box video here*
3. Check for a blade. A blade should already have been installed in the blade housing (silver capsule). Check by pressing the plunger on the top of the housing unit. The pre-installed blade should then extend from the bottom of the unit. If the blade is not installed, please follow the instructions in the “Adjusting/Replacing the blade” section.
4. Insert the blade housing into the housing cradle. Loosen the large silver screw located on the left-hand side of the machine to allow the housing unit to be placed into the housing cradle. Once the blade housing is in place, hand tighten the silver screw to secure.
5. Plug in the power cable to the power adapter, then plug into the outlet and the machine.
6. Turn on the machine by pressing the power button on the right-hand side of the machine for one second, then releasing.
7. Once it has finished starting up, follow the on-screen prompts to connect the machine to a wireless network.
8. Log into the app with your store ID and password as supplied by ZAGG, then follow the on-screen prompts to update the app to the newest version.
9. You are now ready to make a cut.
Note: Video instructions on how to make a cut can be found within the “Video Guide” section of the app, as well as here: ISOD Matless Machine Setup
The power cable is not working on my machine, what do I do?
A: If you experience this issue, please contact our support center for further assistance. Details can be found in the contact section of this website.
How do I input the film into the machine?
You can place the film directly into the machine. Place flat then push the film over the sensor and up to the rollers. The rollers will grab the film and take it into the machine. Always ensure the artwork is facing towards you and the QR code side is last to go into the machine.
How do I scan the QR code?
There is a camera in the cutting arm. When you select your device and input the film, it will automatically scan the QR code for you.
Do I need a cutting mat?
The SmartShield machine is matless, so no cutting mat is required.
Can I use my old M4 and M12 blanks with the SmartShield machine?
Yes, you can still use your old blanks with the SmartShield machine. If you have a conversion mat, you can place the blank on to this mat and cut as normal.
What happens if the camera doesn’t scan the QR code?
If the initial scan is unsuccessful, you will have an option to type the code manually.
Maintenance
How do I order replacement blades, clothes, squeegees, or cleaning solution?
These materials are available in a kit and can be ordered via your authorized distributor or by contacting your company HQ.
How do I order replacement blanks?
These will need to be ordered via your authorized distributor or by contacting your company HQ.
How do I replace the blade? (dull/damaged or used for more than 500 cuts)
1. Power off the machine by pressing the power button for one second,
then selecting “Power off” on the screen.
2. Remove the blade housing unit (silver capsule) from the machine by
turning the retention screw (large silver screw in front of the housing)
counterclockwise.
3. Remove the blade from the capsule by pressing on the plunger and
carefully pulling out the blade. Grip the sides of the blade with your
fingers; never directly touch the tip of the blade.
4. Safely dispose of the old blade.
5. Remove the protective cap from the new blade and place it into the
capsule with the blade facing out. The blade is held in
magnetically.
6. Verify the blade depth against the side of a blank to ensure it stops
against the blank but is not longer than the thickness of the blank.
7. Return the blade capsule to the housing cradle and tighten the
retention screw.
8. Power on the machine.
Can I move the rollers if they are not positioned in the optimal position?
The rollers can be moved. To do this, lower the lever at the back of the machine. Using both hands, you can slide the rollers side to side to reposition them. Please make sure the rollers are positioned over grip portions of the bottom metal roller to avoid miscuts.
Troubleshooting
I have no response from my machine, how do I reset it?
- Press and hold the power button on the right-hand side of the machine for about 10 seconds until the machine turns off, then turn the machine back on.
- If these steps do not resolve the issue, contact our support center.